
NOTE: This topic applies to iOS devices and Omnissa Workspace ONE (formerly VMware Workspace ONE). For Android devices and Omnissa Workspace ONE, see MDM Integration: Omnissa Workspace ONE — Android.
Mobile Access Management has deep integration with Omnissa Workspace ONE). The instructions below describe how to set up Mobile Access Management to use Workspace ONE APIs.
For iOS devices you may optionally add an Enrollment Profile for touch-free enrollments of non-DEP devices.
API Integration
API integration adds many additional features to customize your Workflows, including unenroll-before-enroll, assigning organization groups, setting friendly names, and more.
- iOS Devices — API Integration is recommended for both DEP and non-DEP enrollments for iOS devices.
Best Practices
- Imprivata strongly recommends you use a local Workspace ONE admin account for Mobile Access Management APIs and avoid Active Directory accounts. Active Directory admins slow each API call by two seconds, which will make your checkouts slower.
- Set up certificate authentication for the local admin user, which will avoid periodic password expirations.
Step 1: Configure Mobile Access Management
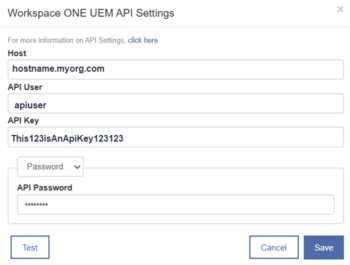
- In the MAM admin console, navigate to Admin > MDMs. Click + Add, and select Workspace ONE.
- Switch the API Integration setting to ON. Click Configure.
- In the API Settings dialog, add API settings that you obtain from the Workspace ONE admin console.
Step 2: Enable REST APIs in Workspace ONE
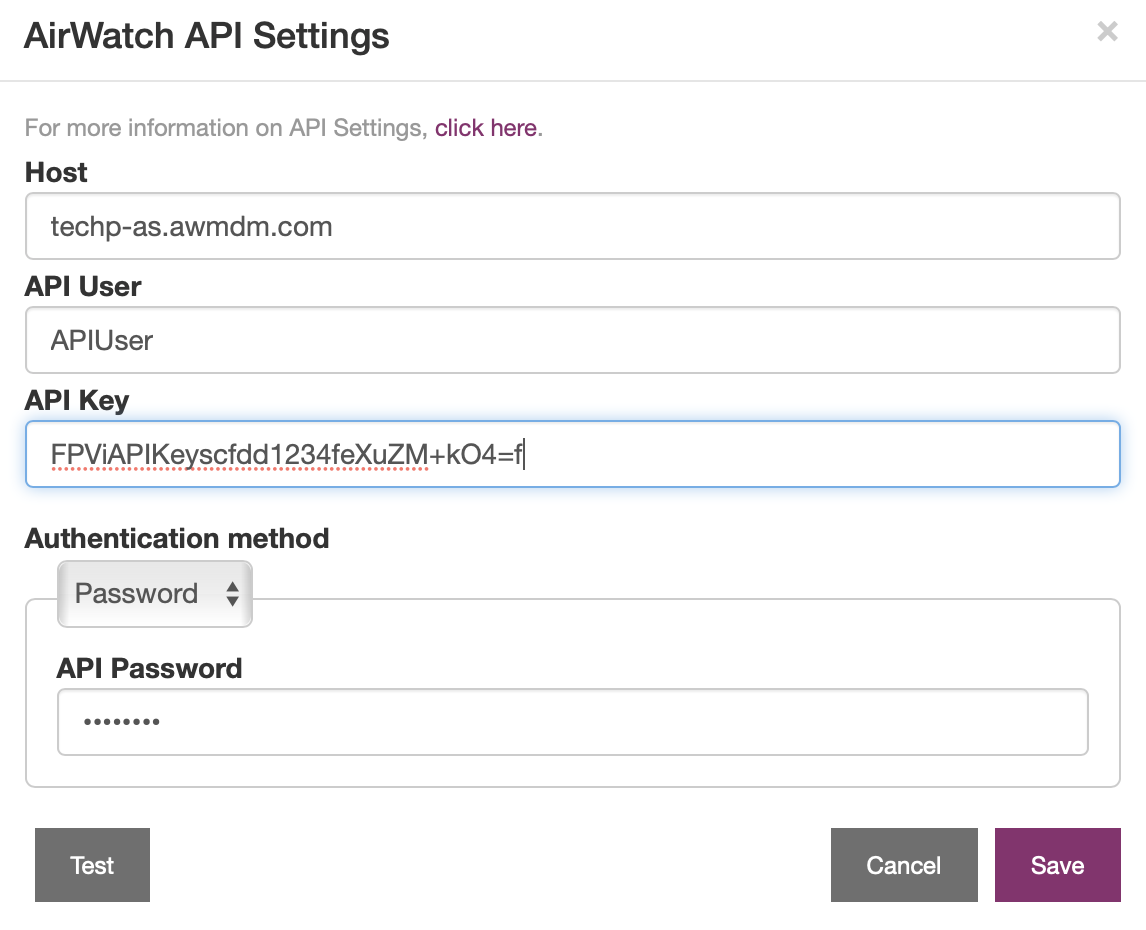
- In your Workspace ONE console, visit Groups & Settings > All Settings > System > Advanced > API > REST API > General.
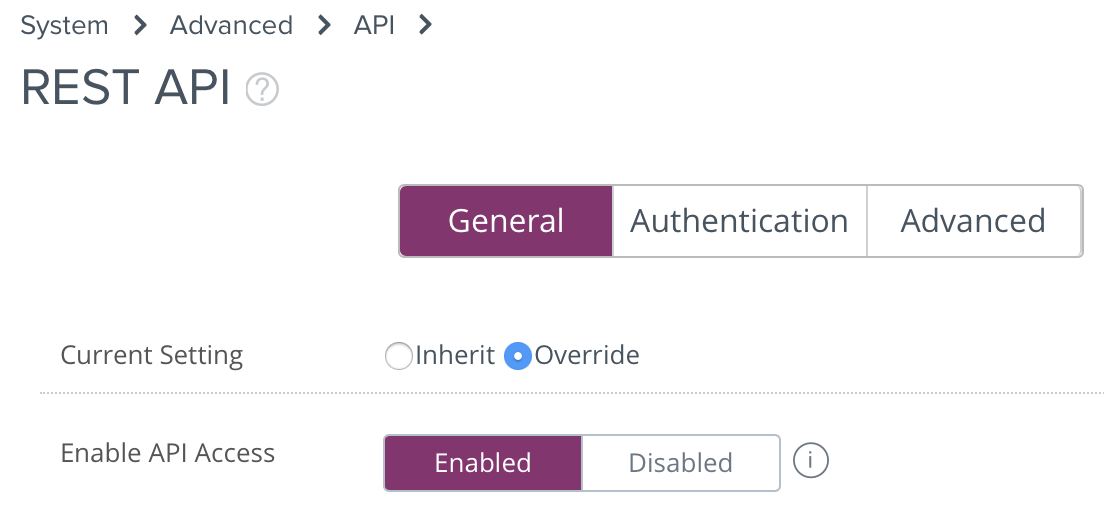
- Ensure that Enable API Access is selected.
- Add a new API key, and label it “GroundControl”.
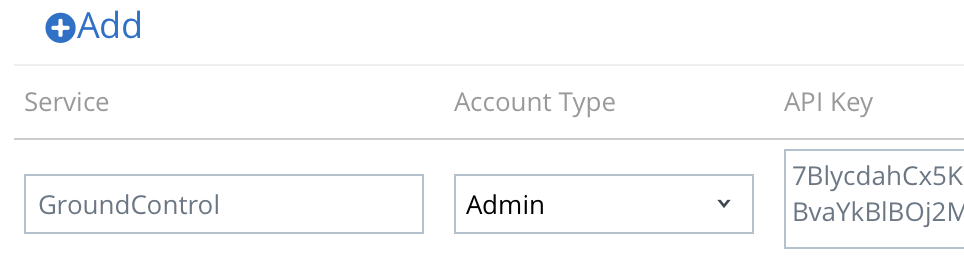
- Copy the newly created API key and paste it into MAM’s API Key field.
- Enter the hostname of the REST API URL, for example “as700.awmdm.com”. Do not include “https” or a trailing slash.
NOTE: This may be different from your Omnissa console URL. See Omnissa KB 82724 for more information.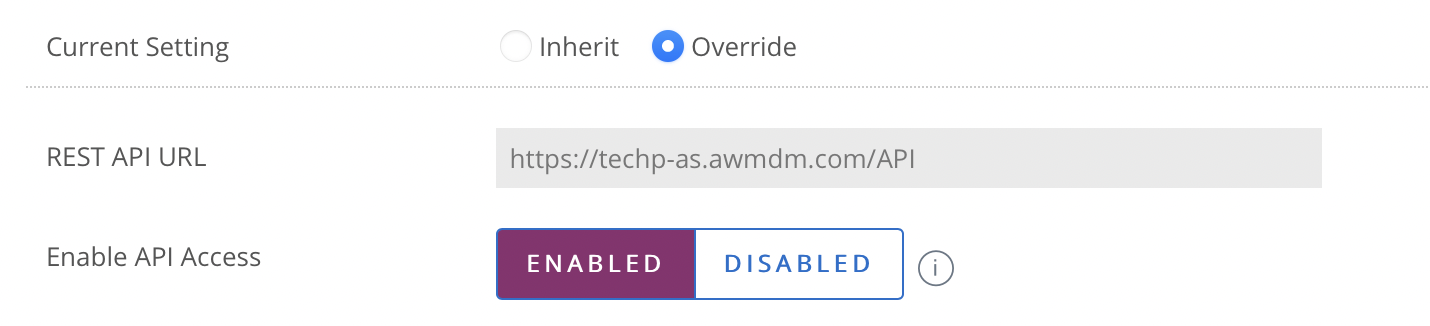
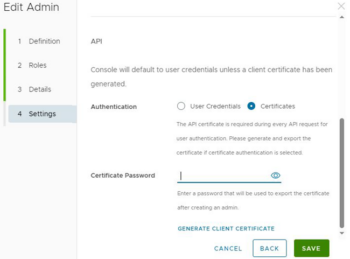
- After enabling APIs, create a dedicated administrator account for API authentication, ensuring the administrator has a role of “Console Administrator” or above. Then, select an authentication method using Option 1 or 2 below.


Step 3: Non DEP Device Enrollment (iOS only)
Applies only to iOS devices.
Enrollment profiles are not required for DEP enrollments. If you have non-DEP devices to enroll, follow these instructions to obtain an enrollment profile from Workspace ONE.
Step 3a: Select an Enrollment Organization Group
Non-DEP devices will enroll devices into this group. You may use API integration to move devices into any child organization group of the enrollment group. Note you can not use APIs to move devices “sideways” into another group, only “down.” For maximum flexibility, Imprivata recommends that you use the root organization group for enrollment.
Step 3b: Create a Staging User
Workspace ONE requires that every device is associated with a user. You will need to create a user (not administrator) to associate devices. Create this user in your staging organization group. You only need to enter the required fields. The password can be anything, as it will never be used.
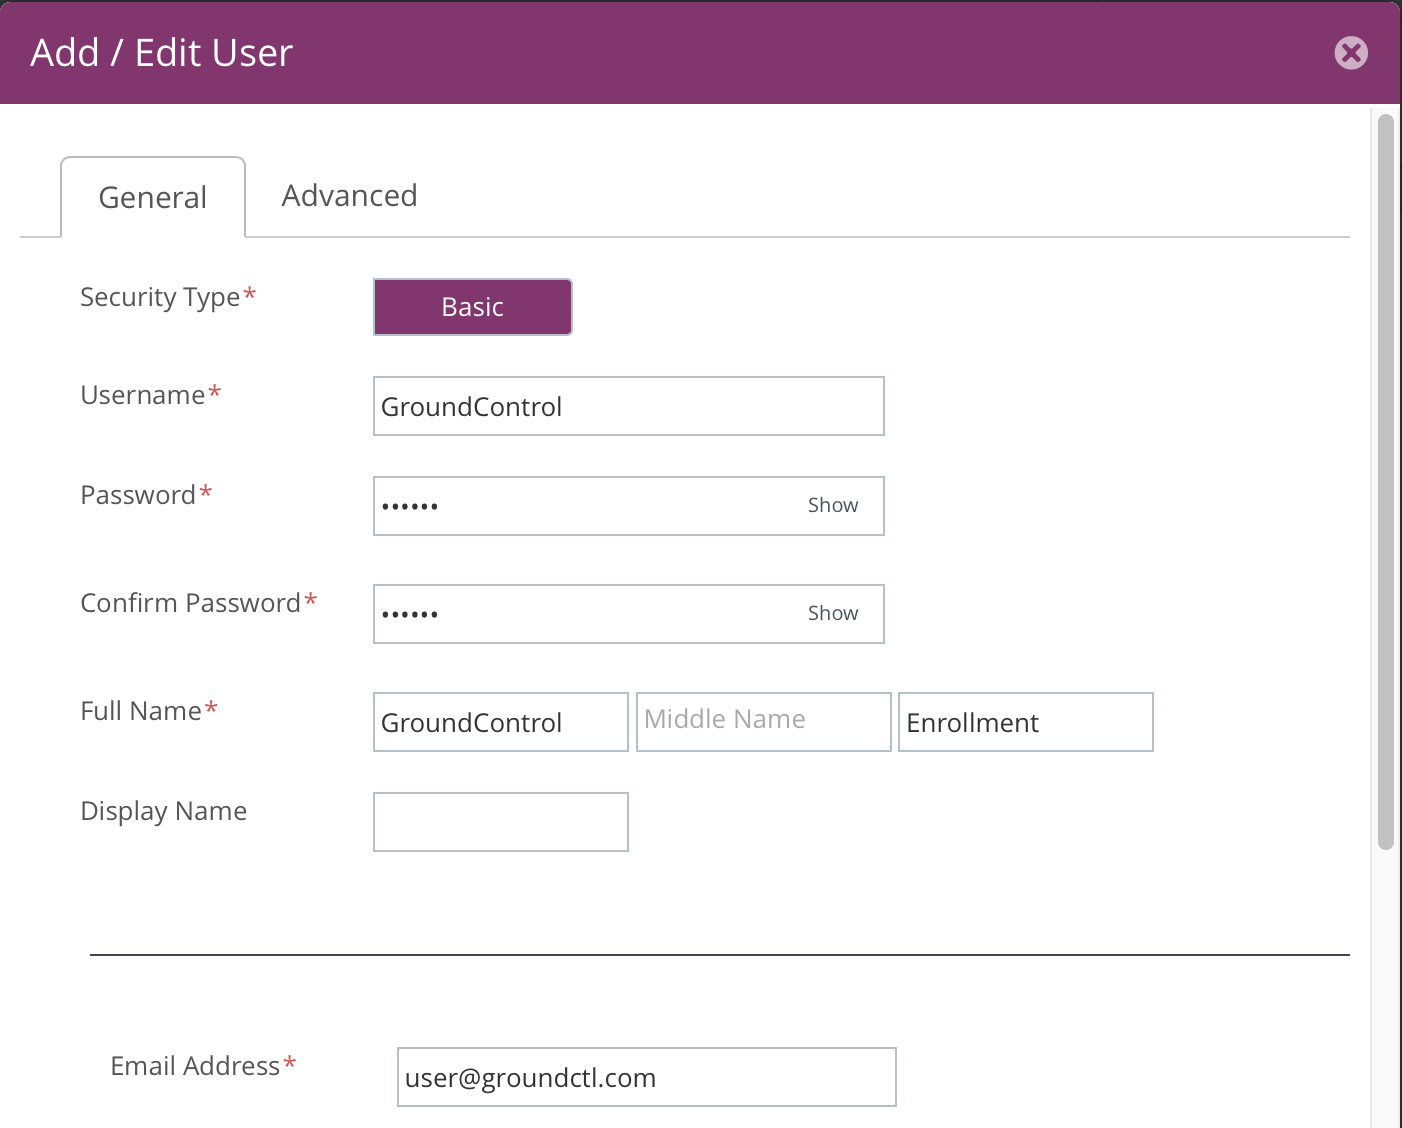
If you are sharing devices, then this configuration is sufficient. All devices will belong to the same staging user. But if you are staging devices for later one-to-one assignment, select the Enable Device Staging box. With this box checked, the device may be re-assigned to a particular user later in the process.
Click Save when done.
Step 3c: Export the Enrollment Configuration Profile
The section to download the enrollment configuration profile is buried deep within Settings. Go to Groups & Settings > All Settings > Apply > Automated Device Enrollment.
Ensure the correct staging organization group is selected at the top of the screen.
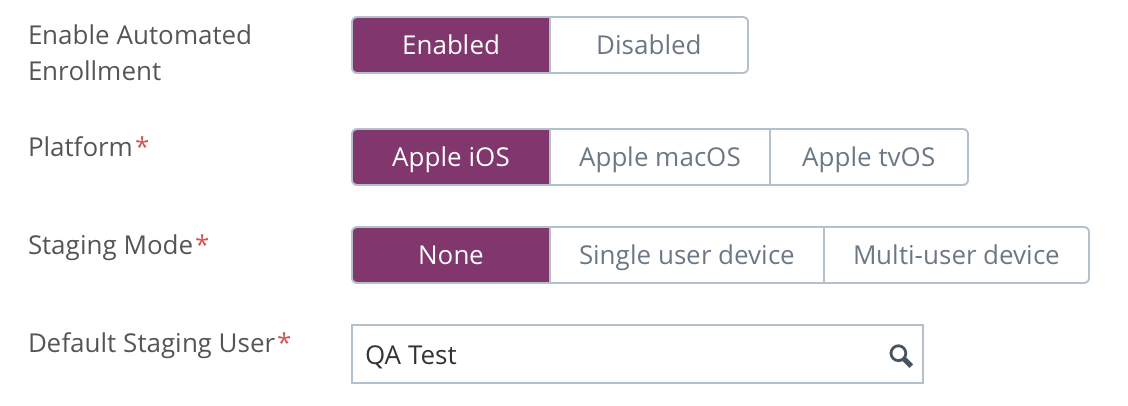
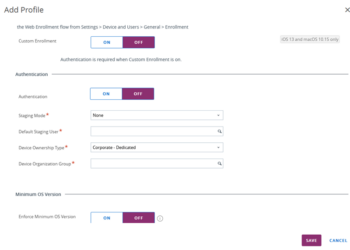
- Click Add Profile.
- Enable Automated Enrollment, and Apple iOS.
- In the Authentication section, set Authentication to OFF.
- For shared devices, set the staging mode to “None.” To stage 1-1 deployments, select “Single User.”
- Select the correct Default Staging User.
- Click Export to download a configuration profile containing this enrollment information. If you are on a Mac, your Mac will attempt to install this configuration profile. Click Cancel or you will enroll your Mac into Workspace ONE,
- Locate the downloaded configuration profile on your Mac or PC. Upload this file into the Workspace ONE setting within MAM.